I made a muslin petticoat for the
1910's Lawn Graduation Dress.
The petticoat not only helps to hold out the shape of the dress, but
will also help to keep the dress from brushing up against the dirty
floor.
I chose unbleached muslin because it was cheap, natural, and suggested
as a material for use in museum displays. Muslin would have also been a
period appropriate material--maybe not to make a petticoat with, due to
its rather coarse texture, but it is serviceable for display purposes.
I didn't want to spend any more of my budget money on patterns, but then
I remembered that I had Simplicity 4078, thoughtfully gifted to me by a
friend a few years ago. The pattern's pieces for the skirt are the same
as for the petticoat.
 |
| See that little ruffled petticoat on the bottom left? I used the front and side-front pattern pieces. |
I omitted the ruffle on the petticoat, as the
"Graduation Dress"
is pretty
slim--a much later silhouette than these full skirts. The back panel of
the skirt/petticoat was HUGE--just one back panel was almost half of
the waist measure. The two back panels are meant to be gathered, but I
didn't want all that fabric bulking up the silhouette, so I just omitted
the back panels completely. To compensate, I just cut two more of the
side-front panel and one more of the front panel (I didn't cut the front
panel on the fold--thus splitting the front panel into two mirror
pieces). I was trying to achieve the 7-gore petticoat look, only
slimmer.
See how the front half of each petticoat above is constructed with one
front panel, and two side front panels? I figured that the arrangement
would be similar in the back. For the "front" panels in the back, I cut
them along the selvedge in place of cutting them on the fold. This
allowed me to omit a finicky skirt placket, because I will just have to
fold and manipulate the selvedge edges. This also saves me time, because
it's one less seam I don't have to flat-fell; the selvedge will never
fray.
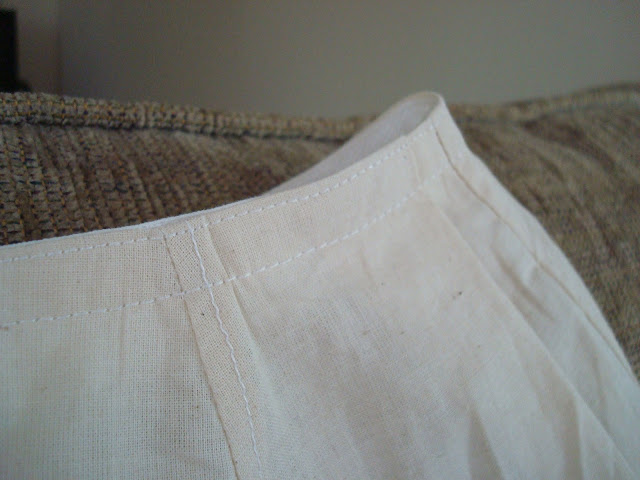
I sewed the seams with a flat-felled seam technique, because I want this petticoat to be strong and supportive for its
Graduation Dress,
and I wasn't about to risk any fraying seam mishaps. I was worried the
flat-felled seams would be too time consuming and difficult to do with
those curved upper edges, but it wasn't so bad. It took me probably 3
hours to flat-fell all the seams--about 30 minutes for each seam
(including the ironing, folding, and pinking).
I was careful and prudent in stay-stitching around the top of the skirt
to prevent the curved top edges from stretching out as I fitted the
pleats of the skirt on the dress form. I used twill tape to make the
waistband, as I wanted something super-durable that wouldn't stretch out
or warp from being displayed for an extended period of time. Twill tape
is also a period accurate material, and a nice little way to "cheat" in
my opinion, when there is a bit of a time crunch. The waistband closes
in the back with a large, flat hook and eye.
 |
|
 |
|
 |
| Neat flat felled seams! Though I might've made them inside out...oh well, they still serve their purpose. |
 |
| Handsewn blind-stitched hem |
 |
| I think this kind of waistband treatment came out really polished and sturdy. |
 |
| Inside of the twill tape waistband. |
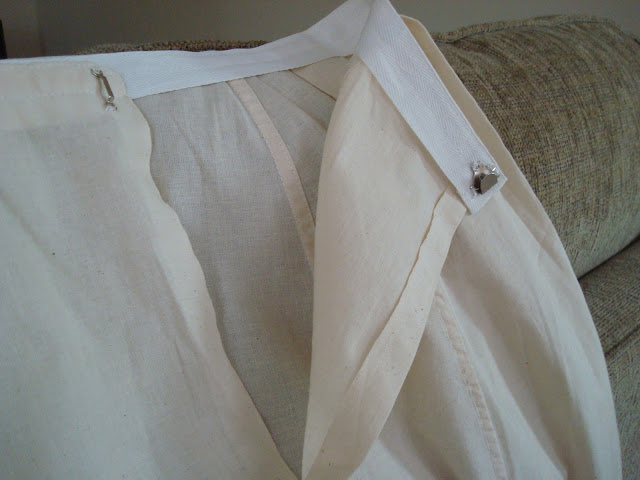 |
| "Placket" on the selvedge edge and hook and eye closure. |


No comments:
Post a Comment